
How to Make Burned Paper Printed Nails at Home.
All you need to make Attractive Burned-Paper Printed Nails (Nails Art), using: Old Dictionary Paper, White Nail Paint as the base color, Clear Nail Polish or Top Coat, Brown Nail Paint to make burns on paper, Nail Polish Remover, Tweezer, Scissor, Any cup filled with water, and Cotton Swabs. How to Make Burned Paper Printed Nails at Home.
ATTENTION:
I will teach you new Nail Art called Burned-Paper Printed Nails, using printed paper. “Nail Art is seen in many ways as a therapeutic release for women, making them feel better about themselves. It’s an amazing way to show your own individual personality while making sure that no one else has the exact look, like you”.
We have been told that most Nail Arts are almost impossible to do at home for most of the girls. For me, it is because they have not figured easy ways around it. One unique thing about Nail Arts is when done right, it looks so attractive and unique.
Here, I will teach you how to add paper right onto the nails. This particular nail art is very attractive and definitely going to catch everyone’s attention around you and it is very easy to do at home. You don’t need to have or buy all the sparkly rhinestones, sprinkle beads, studs, acrylic decals, striping tapes, etc. You just need an old and torn paper with a print on it and few nail paints.
I am going to be using an old Dictionary Paper. Ok, I am going to list all you need to make paper-printed nails.
What You Will Need for Attractive Nails
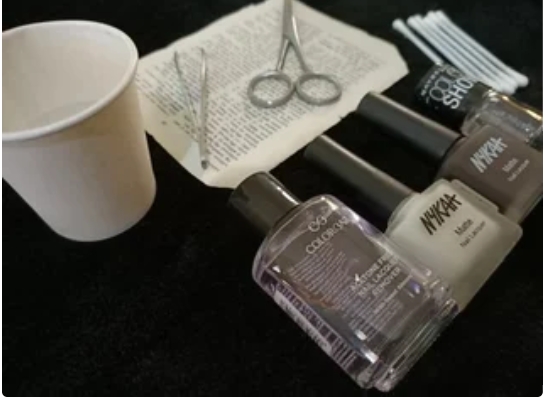
- 1) Old Dictionary Paper.
- 2) White Nail Paint as the base color. I am using Matte one as I believe matt is going to hold the paper much easier.
- 3) Clear Nail Polish or Top Coat.
- 4) Brown Nail Paint to make burns on paper.
- 5) Nail Polish Remover.
- 6) Tweezer.
- 7) Scissor.
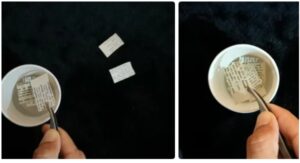
- 8) Any cup filled with water. I have used a paper cup.
- 9) Cotton Swabs.
How to Make Burned Paper Printed Nails at Home.
The 1st Step: Prepare Your Nails and Apply Base Coat
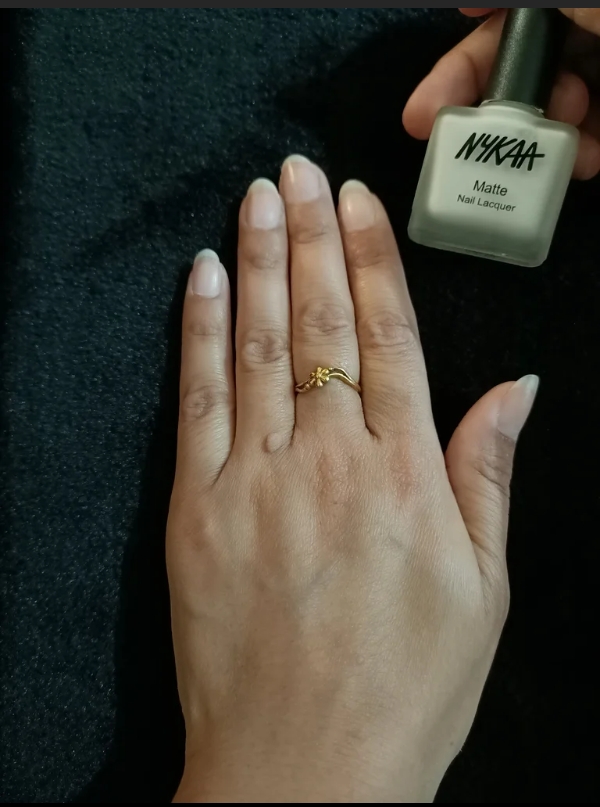
The first step here after getting the items you will use together is to remove Nail Polish on your nails if any and wash your nails to make sure they are clean. The paper print does not work better when applied to any color other than black or gray color. Try to use a lighter color for the base. The lighter the color the more visible and shiny the print will be.
Apply two coats of White Nail color and let it dry completely. Use nail polish remover and a cotton bud to remove excess nail polish if any.
How to Make Burned Paper Printed Nails at Home.
2nd Step: Prepare the Paper
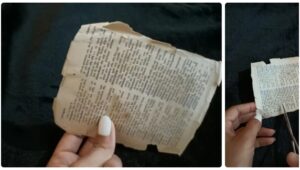
There is no rule as to what paper to use. You can use any old paper for your Nails Art. You can use torn papers, Old papers. For me, I love the blue color print. So, I will be using old dictionary paper for my nail.
Take the paper and using a scissor cut out 5 pieces of the size approximately 2″ x 1″ (one for each nail) and set aside. Make sure the Paper is wide enough to cover each nail. Cut 10 pieces for both hands and cut extra in case you make a mistake in the process.
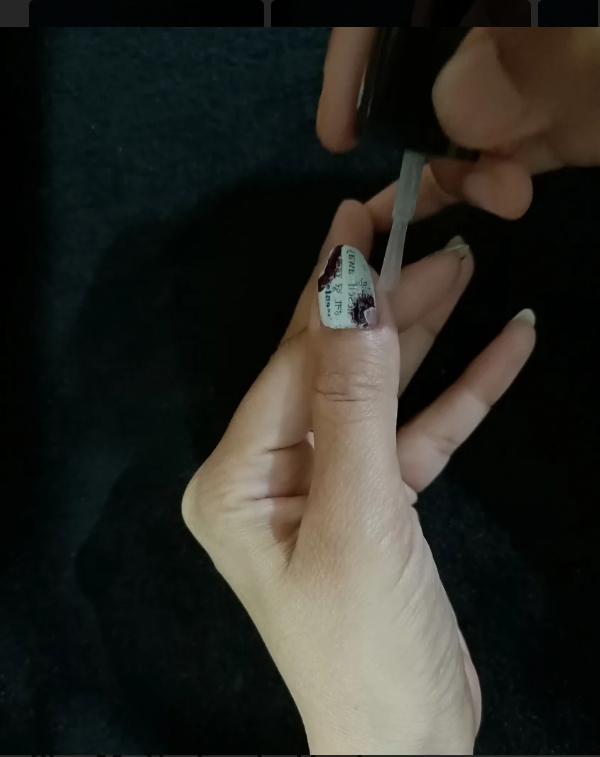
3rd Step: Soak the Paper and apply on Nails
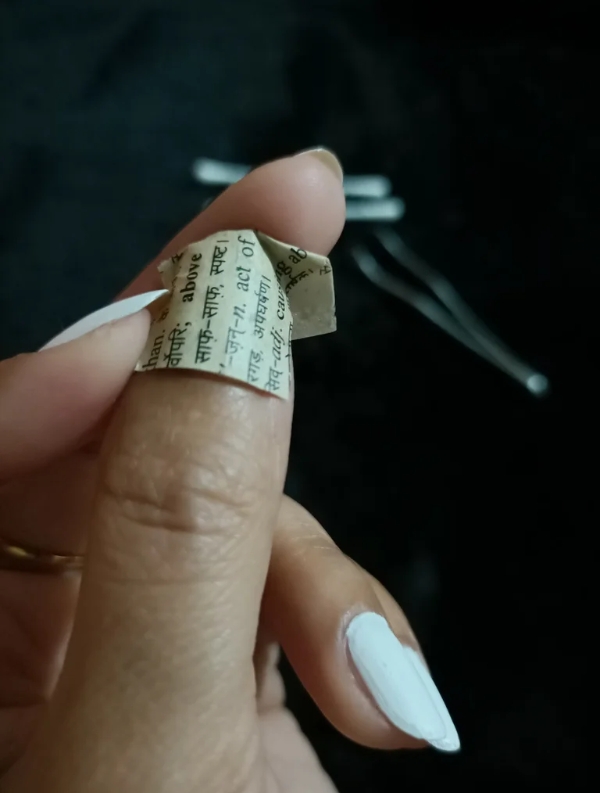
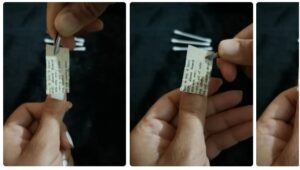
Soak the paper which you have cut in water. Some prefer to use an alcoholic base. But water is preferable.
Make sure you begin applying the Paper only after your nails are completely dry. Overlay the paper directly on the nail. Use a tweezer to position the Paper so that your nail is fully covered.
You should use your thumb to press the paper hard. Then using a cotton bud dipped in water press all over your nail for about half a minute until the print is fully transferred. Don’t move the Paper.
Note, the only way to get the desired printed result is to press firmly on the paper when placed on your nails. This will make the print more visible.
4th Step: Peel Off the Paper
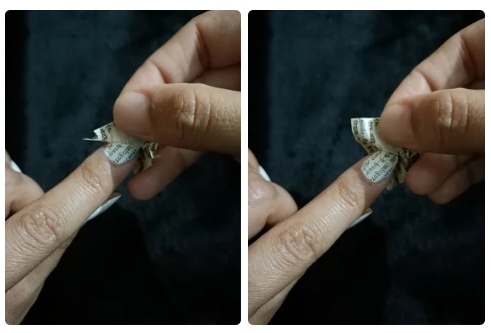
After around 30 seconds, carefully peel off the paper back to reveal your text. It’s not necessary that each print on the nail will be the same. If the paper is not pressed correctly, it may happen that the print won’t transfer completely. Repeat the laying and peeling process for each nail.
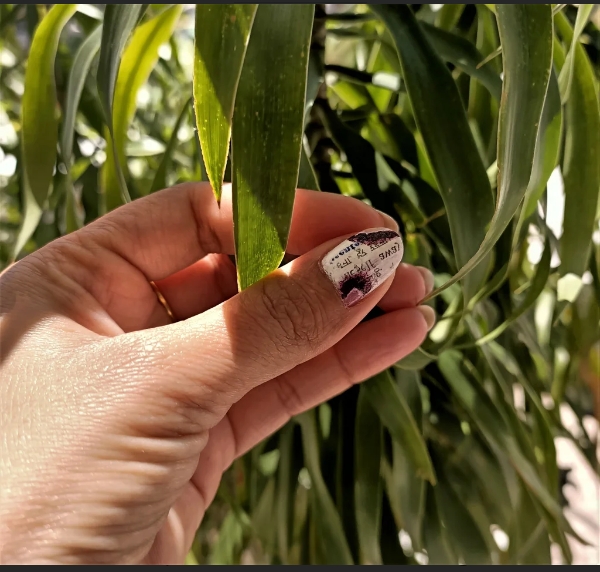
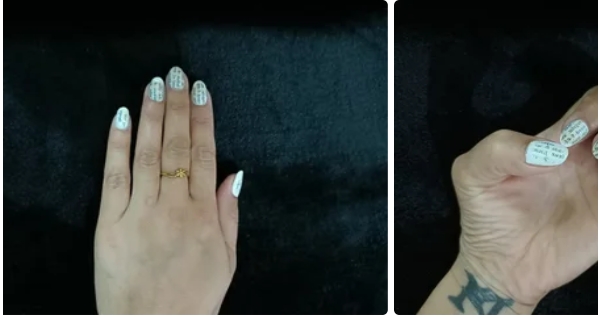
This is Paper Printed Nails. It is beautiful and I like it. One peculiar thing about this particular Nail art is that the process is a bit longer but it is safe for your nails.
What About Adding a Twist to the Printed Nails?
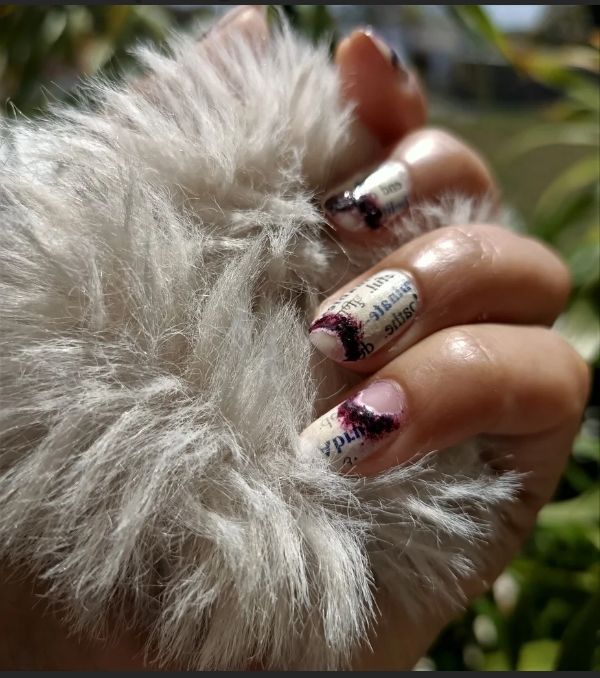
Look at my nails. It is not just paper-printed nails. There is a twist to it. That is how the name comes from- BurnedPaper Style.

You don’t need to place the nails on the fire to give it a burned mark. All I need is Dark brown nail paint to smudge areas where I want the burned paper effect. I am choosing the areas where the text is not printed properly. Take a very small amount of dark brown nail paint on the cotton bud and start smudging the areas. Apply more on it to give a darker burned effect.
How to Make Burned Paper Printed Nails at Home.
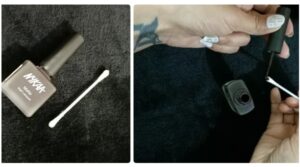
How to Burn the Paper on the nails
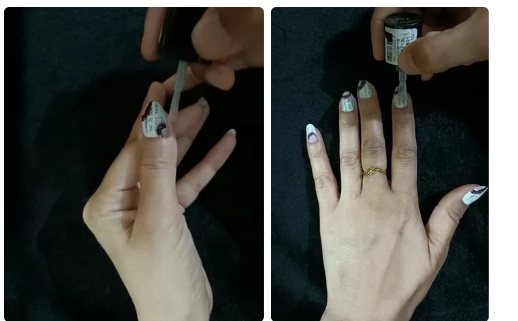
Take a cotton bud dipped in nail paint remover. Start pressing the bud inwards on the brown smudge so that you can see the nail underneath, and get the effect of a burned paper. Repeat this step with all the nails.
Allow nails to dry again for five minutes. To ensure that the nail art and its print don’t rub off, finish the nails with a clear topcoat. This is the most important step. It will provide you with nails that won’t quit with your busy lives. The glossiness of the clear nail paint will enhance and intensify the letters giving it a truly Burned Paper Effect.
